So…once I find all of those blues, I actually have to DO SOMETHING with them. Remember: this is a bargello project. I’m still firmly convinced of that, even after I had to make a spreadsheet. A spreadsheet, folks. I must be off my rocker.
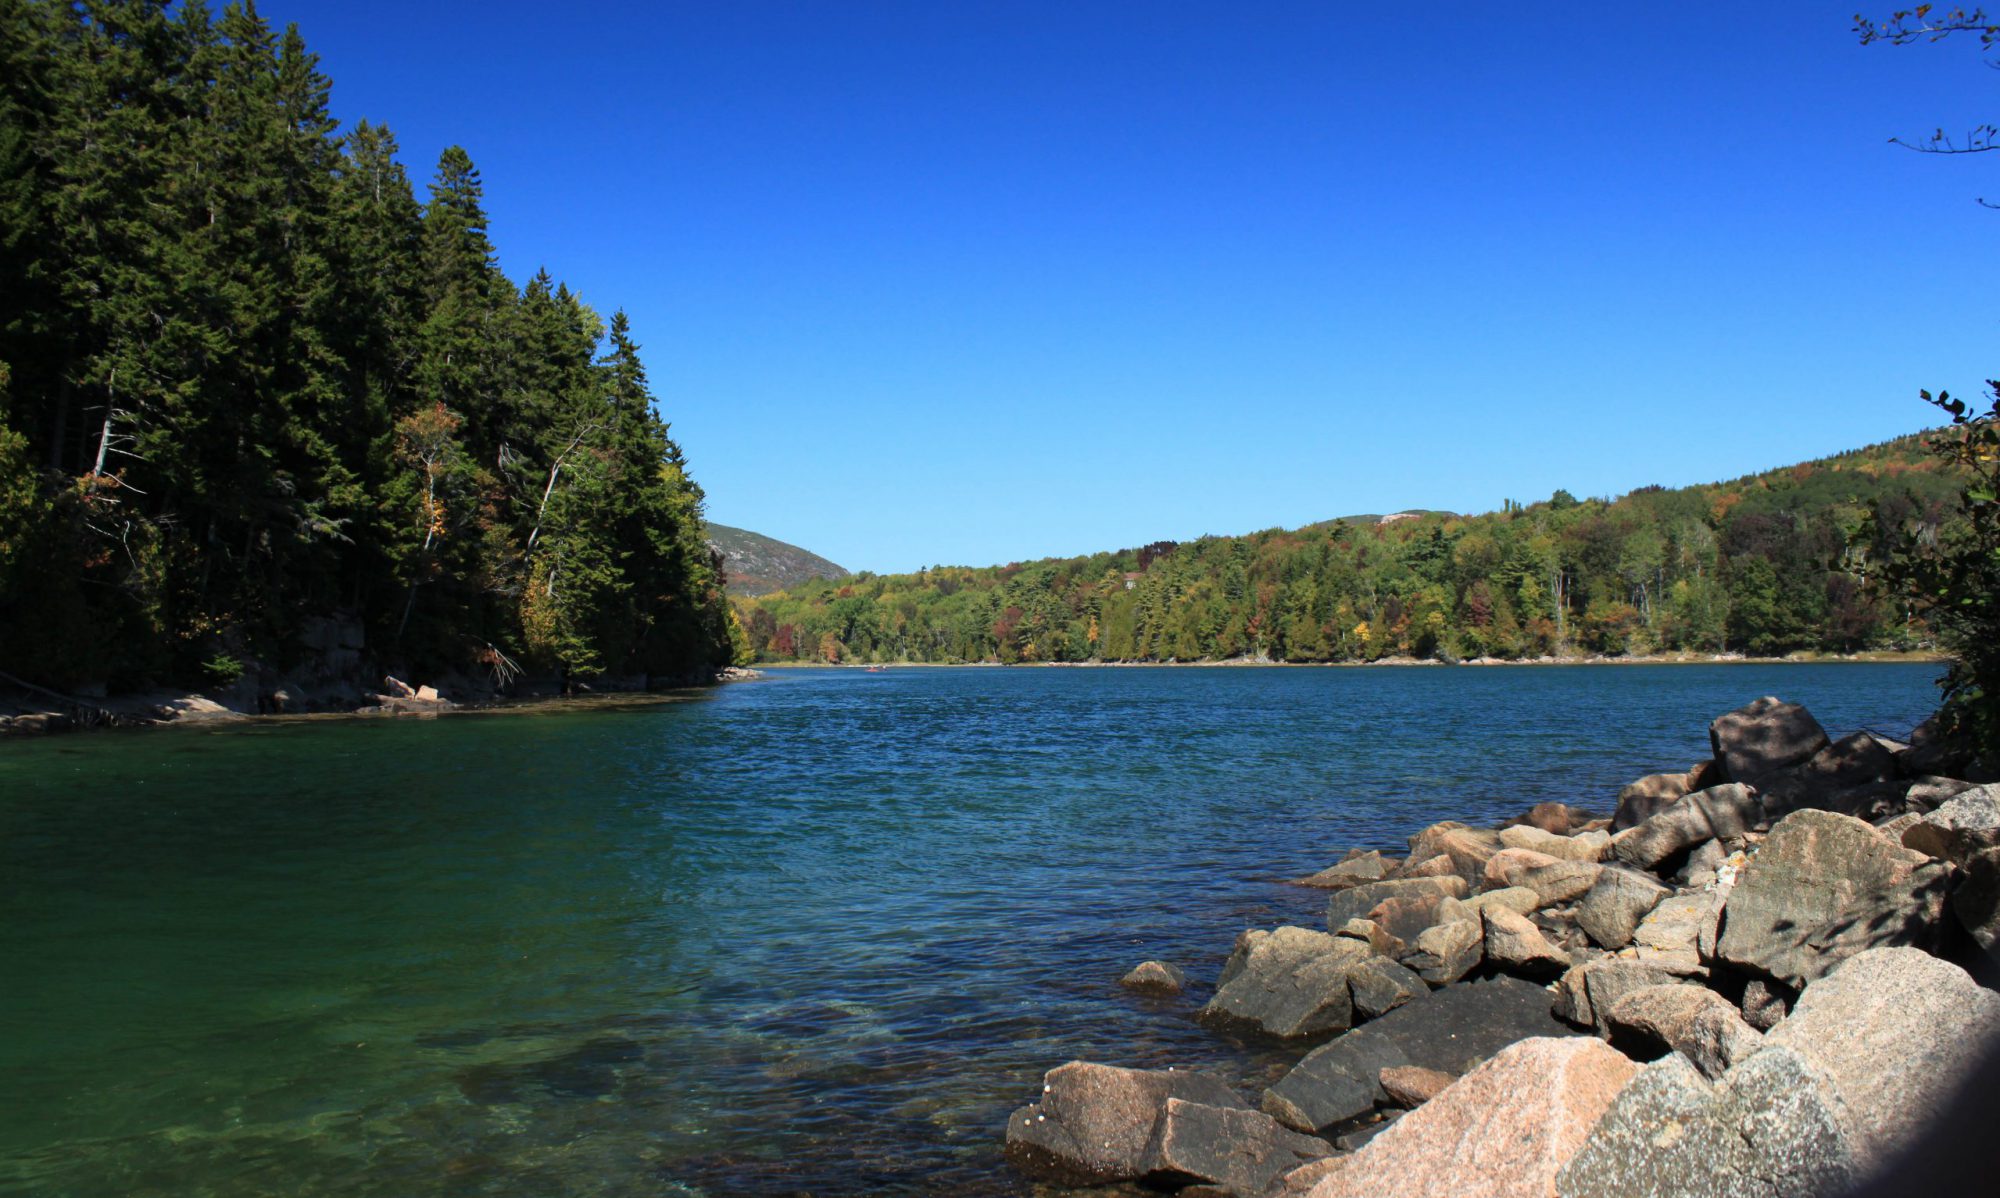
The first thing I did for this quilt was project the image on a wall where I’d taped a large piece of paper. I used the image to draw a rough outline of the shapes I wanted to mimic in the final quilt. The image on paper is 30” high and about 54” wide, so that is what the final quilt will be as well.
A couple of weeks ago, I sat down with a ruler and laid out horizontal lines an inch apart from the water line to the top of the mountains in the image. The water line is 16” from the top of the image, so the image is slightly top-heavy – more of the image depicts above the water line than below it – but the water is basically a mirror, so what I do on the top of the image will be mirrored below the water line. The mountains aren’t really a large part of the image – I think the largest mountains in the image only extend 6-7” above the water line. The rest is sky.
The sky will be fairly “standard” – it will be like a traditional bargello in that it will be the same colors, in the same order, simply staggered to create the appearance of movement. (Remember that I have mother-of-pearl buttons to create the clouds in the sky, so much of the sky will be covered by “clouds.”)
In a traditional bargello quilt, the height of the blocks is usually standardized – 1” finished, in most cases, but sometimes 2” finished. The width, however, varies depending on the effect that the pattern needs to create – a steeper angle needs pieces with smaller widths, while flatter curves can use wider pieces.
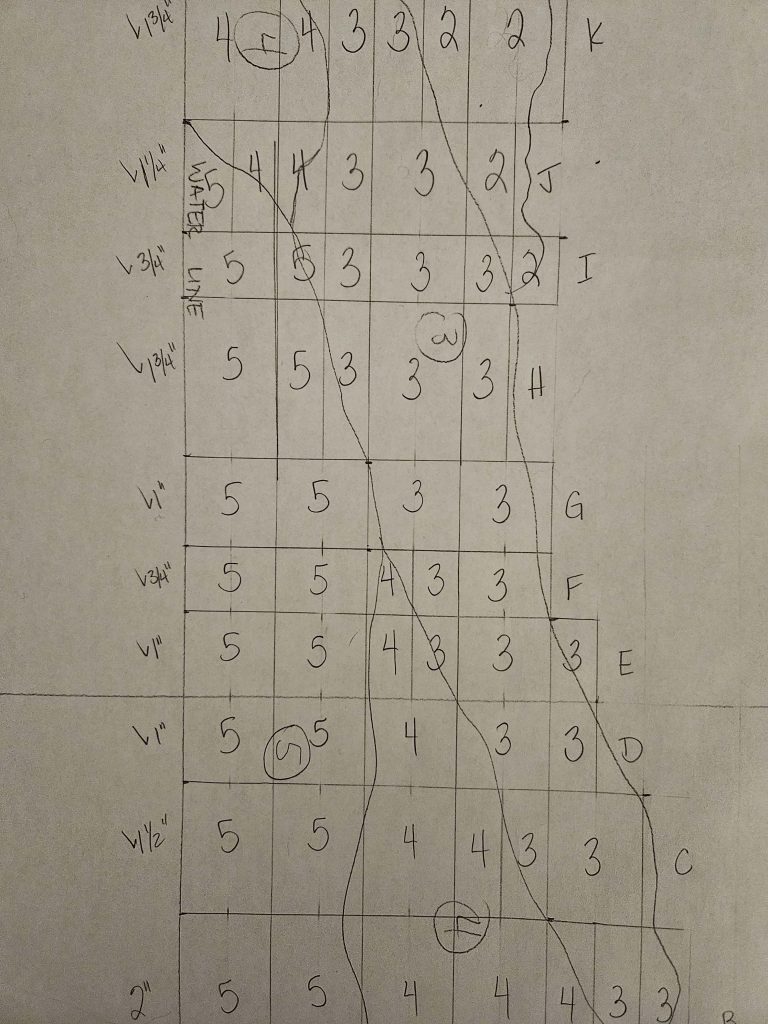
To create the mountains for this quilt, I squared off the contours of the mountains into 1”, or sometimes ½”, pieces, and varied the widths according to the changes in the coloring. I’d already assigned the six muted blues – I think I’ll call them mountain blues – to parts of the traced image, so all I had to do was number each of the squared-off pieces with the number of the mountain blue that it covered. I ended up with 54 columns of widths varying from ½” to 2”.
Here’s where it gets complicated. In a traditional bargello, the colors stay the same and appear in the same order. In this one, not a single one of the 54 columns is going to be the same as any other (except its mirror image below the water line). And therein lies the challenge…and the spreadsheet.
I labeled each column with a letter. And when I ran out of letters, I doubled them (AA, BB, etc.). And when I ran out of those (I didn’t use I, II, O, and OO for somewhat obvious reasons), I used the three extra letters in the alphabet of another language I speak, and doubled those as well. (Fortunately, I ran out of columns about the same time I ran out of letters and didn’t have to resort to Cyrillic.) I put each of those into a spreadsheet. I wrote down the width of the column, added a seam allowance, and doubled it (for its mirror image below the water line), and then I wrote down the number of 1” and ½” strips of each color that I would need. The spreadsheet is detailed. I am a dork, but I am an organized dork, at least on paper.
This is what the paper drawing looks like with all of my scribbling on it.

In the image, the water line is the straight line on the left, and the squiggly lines are the original tracing of the actual image. The rectangles with numbers in them will be pieces in the quilt; the numbers represent the blues – the higher the number, the darker the blue. The open space to the right is sky.
I hope it still makes sense to me when I sit down to actually sew the dang thing together.
