WordPress database error: [The MySQL server is running with the --read-only option so it cannot execute this statement] DELETE FROM `wp_options` WHERE `option_name` = '_site_transient_wp_theme_files_patterns-890b82f054d0977074a5148474f89490'
WordPress database error: [The MySQL server is running with the --read-only option so it cannot execute this statement] DELETE FROM `wp_options` WHERE `option_name` = '_site_transient_timeout_wp_theme_files_patterns-890b82f054d0977074a5148474f89490'
WordPress database error: [The MySQL server is running with the --read-only option so it cannot execute this statement] INSERT INTO `wp_options` (`option_name`, `option_value`, `autoload`) VALUES ('_site_transient_timeout_wp_theme_files_patterns-890b82f054d0977074a5148474f89490', '1740339186', 'off') ON DUPLICATE KEY UPDATE `option_name` = VALUES(`option_name`), `option_value` = VALUES(`option_value`), `autoload` = VALUES(`autoload`)
WordPress database error: [The MySQL server is running with the --read-only option so it cannot execute this statement] INSERT INTO `wp_options` (`option_name`, `option_value`, `autoload`) VALUES ('_site_transient_wp_theme_files_patterns-890b82f054d0977074a5148474f89490', 'a:2:{s:7:\"version\";s:3:\"3.8\";s:8:\"patterns\";a:0:{}}', 'off') ON DUPLICATE KEY UPDATE `option_name` = VALUES(`option_name`), `option_value` = VALUES(`option_value`), `autoload` = VALUES(`autoload`)
WordPress database error: [The MySQL server is running with the --read-only option so it cannot execute this statement] UPDATE `wp_options` SET `option_value` = '1740337386.3258659839630126953125' WHERE `option_name` = '_transient_doing_cron'
I finished the last of the binding on the Horseshoe Canyon quilt while I was on vacation a couple of weeks ago (finally catching up on the blog), and I’m really happy with it.
The binding wasn’t quite done when this picture was taken, but it was close enough.
It’s rare for me to think that a border fully completes the quilt, but in this case, I totally believe it. I wasn’t entirely sure I liked the quilt before I put the border on it, to be honest. Once I put the border on, it felt…right for the first time.
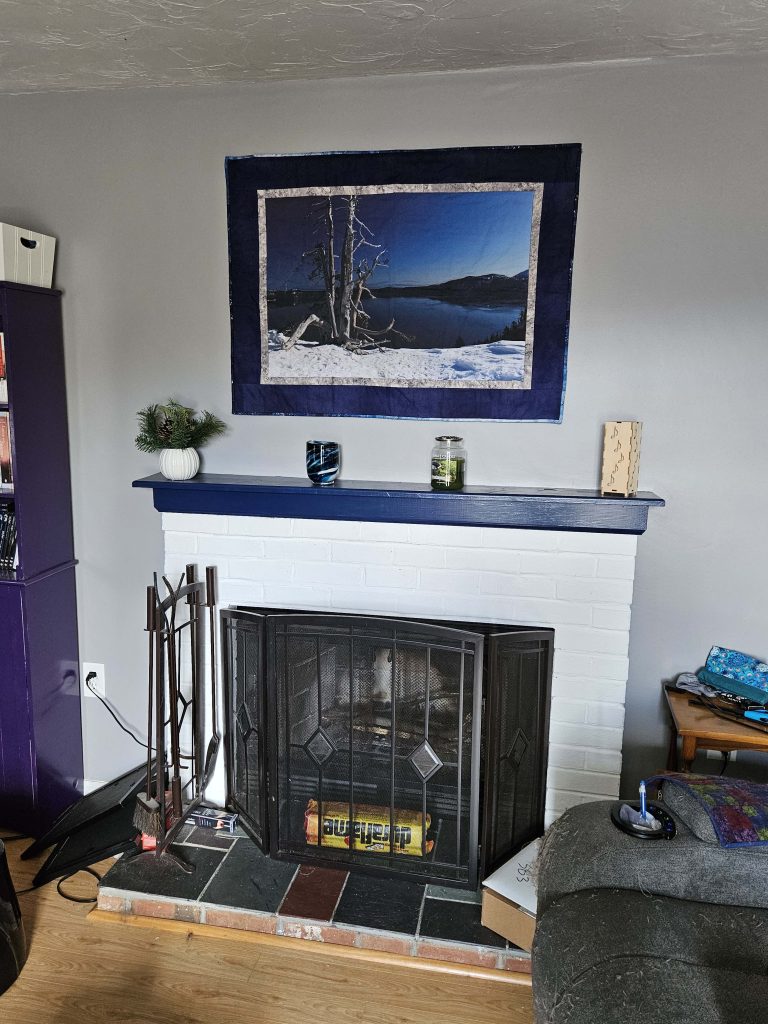
While I was at it, I hung the Crater Lake quilt over the fireplace for the first time as well. Here’s that update:
I think I started that quilt almost two years ago, and it’s finally up over the mantle. I’m glad it’s done, and I think it looks exactly like I was intending for it to look. That’s pretty rare in my house.
I’ve also been working on the College Fjord bargello, but it is slow going and I am still trying to find solid blue fabrics, so an update on that will have to wait.
My machine is home! It was gone for all of four days. It was a timing issue and covered under warranty, so yay! I picked it up at the sewing center yesterday, and it was all ready for me to go first thing this morning.
Today was a busy day. I hung the national park quilt, which took a lot longer than I thought it would because of things I couldn’t find (hello, ADHD). I’ve been meaning to do that for a while – I just got sick of looking at a blank wall and having my voice echo in the hallway. So that’s done.
I started in on the foundation paper piecing for the abstract iceberg quilt after that. It’s been such a long time since I last did any foundation paper piecing that I lost of my add-a-quarter ruler, probably somewhere in the move to my current house (which happened in May of 2022, so a little over two years ago). So…the trip to the store to get a new one happened. Fortunately the closest store is two miles up the street and open on Sundays. I was thinking I might find the old one once I bought a new one, but noooo.
Six of the 36 blocks (18 A blocks and 18 B blocks) are now done. Two of them got done twice ‘cause I wasn’t paying attention and screwed something up. Fortunately, I use David Sirota’s No More Tears paper piecing method, so the paper wasn’t destroyed and could easily be reused to do the blocks the right way. (I did find the instructions for that method in a project from the class that I took with David well before my 2022 move…which still isn’t done. And no, the ruler wasn’t in there. It was the first place I looked.) It’s slower going than I would like, but given my propensity to screw up, I will take my own sweet time, thankyouverymuch. I figure if I spend a couple of hours on it when I have a free evening, I might have it done fairly quickly. But then again, all of my other hobbies (chorus, photo club, quilt guild, etc.) are starting up again with the start of the school year, so who knows.
When I got bored with that (hello again, ADHD), I sewed the borders onto the Horseshoe Canyon quilt. I like it SO MUCH BETTER with the borders on it! I thought about putting the layers together to quilt it but discovered that I hadn’t gotten quite enough backing fabric because I forgot to add in the width of the borders. So this necessitates adding a 10” strip down the middle of the backing fabric, which I was just not going to get done tonight. Maybe tomorrow. But I am so pleased with the quilt now that it has borders on it. The border is a black batik with a navy blue pattern on it, so it looks solid black in low light, and it just helps to balance the dark greens in the middle. I promise to post a picture of it when it’s quilted and bound.
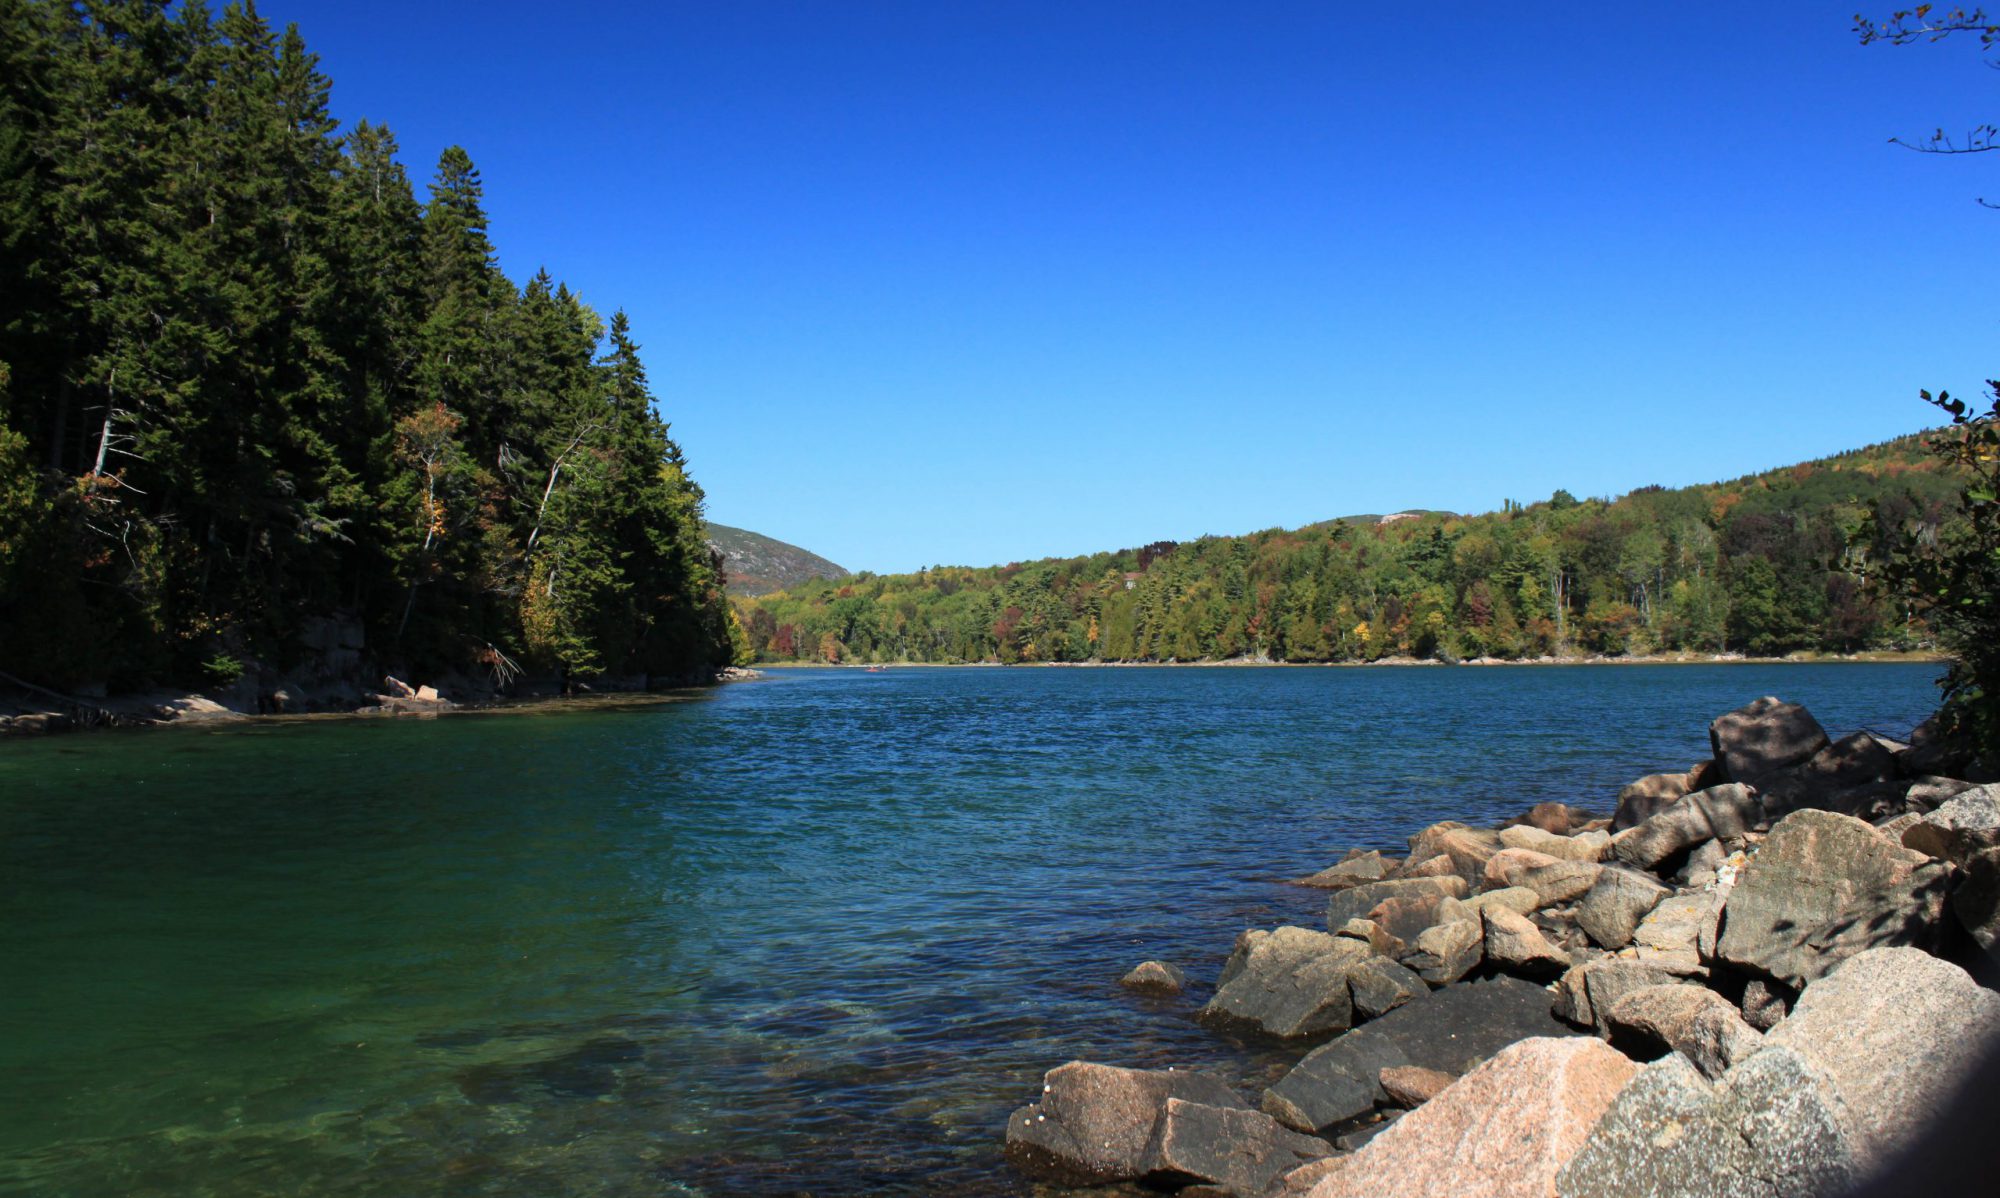
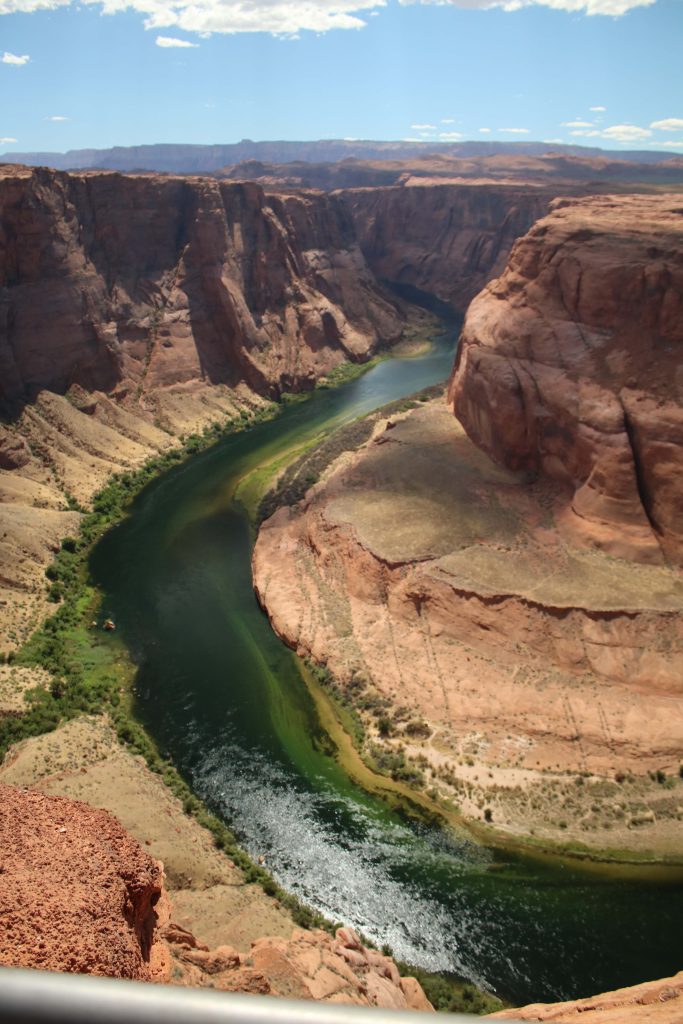
This is my first attempt at a quilt based on a picture as part of this new project. The image I chose is from a 2019 visit to Arizona and the Grand Canyon. My friend Nicole and I took a day trip to Antelope Canyon and stopped at an overlook over Horseshoe Canyon on the way back. This is an example of a picture I like that didn’t have a particular focus element in it that would make it interesting printed out on fabric. It also wouldn’t have lent itself well to the applique method I learned, so I decided this would be an abstract version.
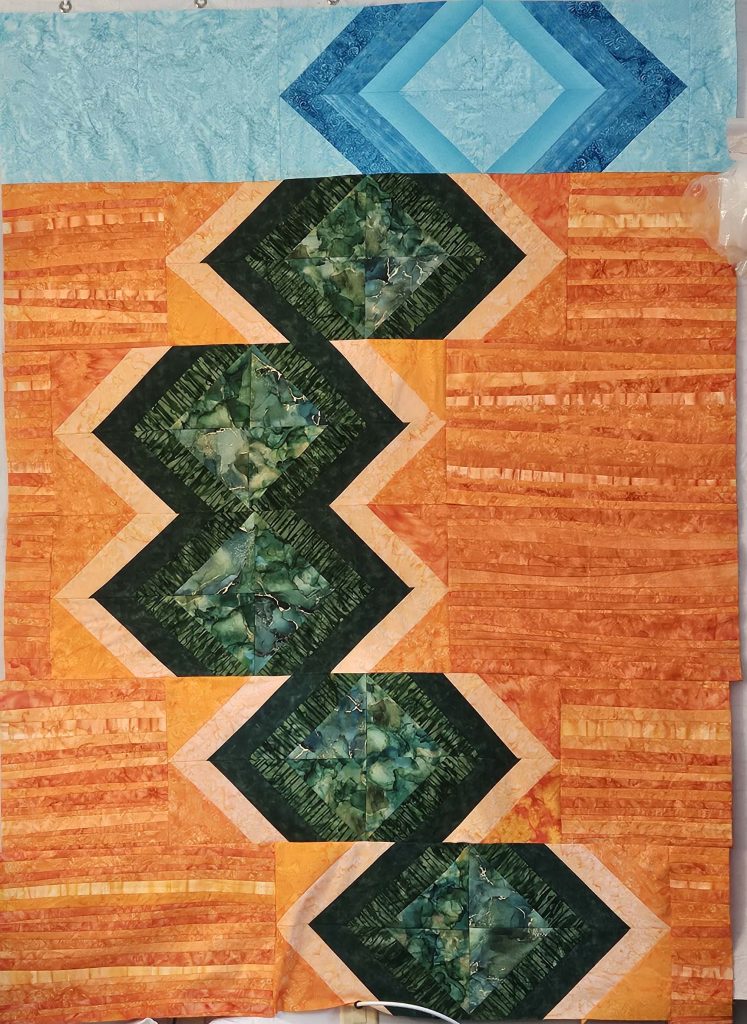
I like this photo because it has movement, and I think the colors go well together. When I was looking for the fabrics, though, I could not bring myself to use the rust color of the canyon itself. The blue of the sky and the dark green of the river – those are totally in my wheelhouse, and I was actually able to use some fabrics I already owned (always a bonus). But I am not a fan of brown, and I wanted the deep green of the river to pop out a little more than it did in the original photo. So I decided to use a brighter orange instead. I liked the combination of dark green, bright blue, and orange – somehow, they just fit together (in my head, at least).
I also found a published pattern called Leading Edge by Canuck Quilter Designs that mimicked the shape of the river as it flowed through the canyon in my image. I ended up changing the order of the rows in the design (as you’ll see), but basically keeping the structure of each row the same. Finding the published pattern that just happened to mimic the image that I was trying ro recreate was a fluke of nature. I’m still not quite sure how that happened as it did. I’m glad it did – I would not have known how to approach recreating that image without the pattern – but I also know that I’m not going to be able to do that with all – or perhaps even any – of my quilts going forward. But this was an excellent way to dip my toes into creating an abstract version of this image. And I’m pleased with the result.
I learned a lot in this process. I leaned into the orange perhaps a little harder than I should have, and in retrospect, I might have sprinkled some of the rust colors in between the orange stripes for variation. But I am unused to working with orange (give me a blue, green, purple, or even red any day of the week, but oranges, yellows, and browns tend not to find any sort of place in my work), so the end result – to my eyes, a wall of bright orange – sort of hit me in the face as I was putting it up on my design wall right at the very end. Could I have stopped and adding a few rust stripes in? Sure. Was I going to do so? Nope. (See my early posts on how it’s better done than perfect.) I chalked it up as a learning experience, and I’m moving on.
I do like the final result. It needs a border, and I haven’t figured out what that might be yet, and I am yet hoping that the border will bring it all together. Because of the orange stripes, there’s a ton of texture already in the quilt, so the quilting is likely to be stitch-in-the-ditch along some (not all) of the orange pieces, plus some texture in the greens and blues. I’ll post a picture when it’s all done, too.